Welcome to Blender Project 1 - Creating a Basic Gear
This project will guide you through the process of creating a simple 3D model of a gear using Blender. It's designed for those who have a basic understanding of Blender's interface and 3D modeling concepts.
Hardware Setup
In this section, we outline the hardware components required for the project, ensuring a smooth modeling experience:
A computer with at least 8 GB of RAM to ensure smooth operation.
A graphics card with at least 2 GB of VRAM (4 GB or more recommended for optimal performance).
A mouse with a scroll wheel, essential for navigating in 3D space.
Software Requirements
Here are the software tools you'll need for the gear creation project:
Blender: Latest version available for free from the official Blender Foundation website.
Graphics driver: Updated graphics driver compatible with your graphics card to handle 3D rendering.
Knowledge Prerequisites
To successfully complete this project, you should be familiar with the following concepts:
Basic operations in Blender such as scaling, rotating, and moving objects.
Understanding of extrusion and basic 3D modeling techniques, including Boolean operations.
Difficulty Rating
Very Easy Difficulty
Project Time!!!
0%
“We don’t make mistakes, just happy little accidents.” - Bob Ross
Project Steps:
Open Blender and start a new project.
Delete the default cube by selecting it and pressing 'Delete'.
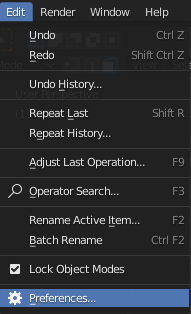
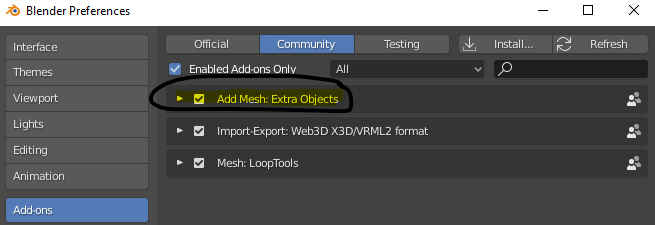
Get a gear picture from an online reference or, use the Add Mesh: Extra Objects Asset pack shown in the pictures below
And yes... doing this will give us a well modeled usable gear... but we want to create our own and learn each step so we can apply to future projects!
Press 'Shift + A' and select 'Mesh' -> 'Cylinder'.
Press 'S' then 'Z' to scale the Cylinder in the Z axis to shorten its height to resemble the reference height.
Press 'Tab' to enter Edit Mode and select face mode with '3'. On the faces creating a ring around the shape select every second face by 'Shift' + 'R-Click'
TIP: You can quickly select all the faces you need but first selecting all outer face with 'Alt' + 'R-Click', on the left hand margin of the face. Then click the 'select' dropdown at the top left corner where we will select 'Checker Deselect' We will see every second face gets deselcted, giving us what we want.If you have a keyboard with a number pad, you can use a handy little trick: Select one face then 'Shift' + '+' to select every second neighbour attached thus quickly selecting all of the outer faces.
Once all outer faces are selected, right click a face and select Extrude Faces along normals.Bring your teeth outwards (a bit more than you would neccesary, you will see in the next step) and voila, the we have a basic gear.
Steps 4 and 5 will be regarding Refining the basic gear. This is where YOU get the chance to make it your own! Remember, the fun and beauty of creativity is being different! If everything was the same how boring would that be?
But, theres no depth to it. It's a flat gear with very little characteristics. Even if are not creating a perfect 1/1 model, we can still do better and easily add character to our gear.
Remember we extruded our teeth out further than we wanted causing for a oddly proportioined gear? Well, now we are going to fix this.
If you did not click anywhere in the project you should stil have the extruded faces selected. Press 'S' and scale the faces inwards creating a rigeted and more realistic teeth look.
Select the top face and press 'I' to inset the face inwards a small bit.
Press 'G' then 'Z' to scale the face down in the z axis.
Now we will press 'I' to inset inwards again and then press 'E' to extrude downwards.
Repeat this step for how ever many rivits you want, we will choose twice
For the last rivit inset we will Press 'E', extrude again but upwards, to create an inner mechanism.
Press 'I' and inset the final face in as much as you can to try and create a single point in the middle of the face.
Press 'G' then 'Z' to scale the faces upwards to create a cone shape and creating a mechanism to spin on.
Our gear is looking good, although there is one last problem. If you haven't noticed, we have only modeled the top face of the gear, not the bottom. Fortunately, blender has a built in mirroring so we do not have to remodel this from scratch.
If we go over to the properties inspector on the right of blender, click the Wrench Icon to open the modifiers section
Click Add modifier drop down, and select the mirror modifier
The mirror modifier automatically applies with the X axis mirrored, as we can see from the model, not the axis we want.
Take as minute to think about which face axis we were working on earlier, this will tell you which face we need to flip.
Did you figure it out? It was the Z axis! If we select the Z axis check box, and the Bisect Z axis, we can see we get a beautiful symetrical gear with complete symetrical work from what we did on the top face.
Congratulations you have created a gear from scratch in 6 easy steps. Now and are ready to head into the next section - Project 2 - with confidence.